
How to Setup Mountain Bike Suspension
Proper suspension set-up is a crucial component of getting the best performance out of your mountain bike. Even the most expensive of bikes will need their suspension setup correctly to ride well.
Front suspension forks and rear shocks both require simple adjustments to work best for a particular rider, so this information is relevant to riders of both hardtail and full suspension mountain bikes.
Luckily, most modern forks use an air spring instead of using a conventional metal coil spring which means getting your suspension dialled in takes only minutes if you follow the simple steps below.
Now let's start by saying a lot of companies will, and do offer suspension pressure guides. While these are a great starting point they should not be used as a fail-safe setting. To get the best out of your setup you should manually set this up.
Tools you'll need.
You'll need a shock pump and something to measure with.
Measuring and Adjusting Air Pressure
1. First, make sure the fork and shock's compression and lockout levers are fully open, not locked out.
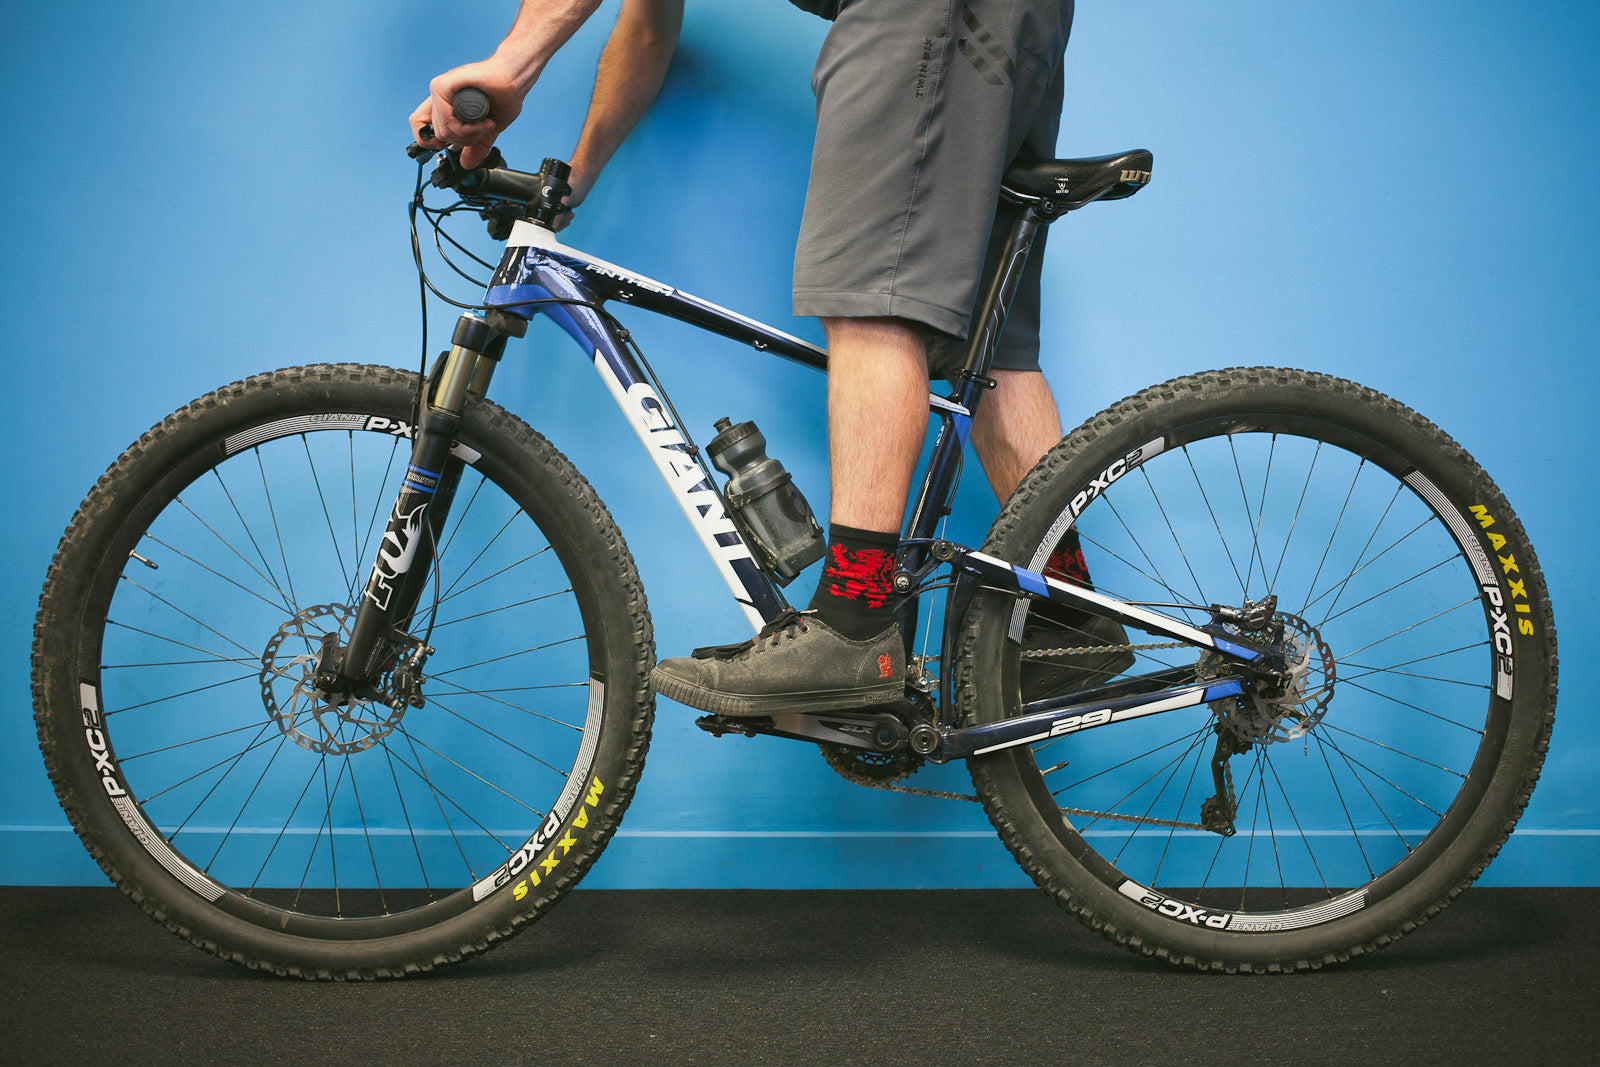
2. Put the bike near a wall to make it easier to balance, our you could get your friend to hold the bike for you.
3. Get on and get in a neutral riding position centred in the middle of the bike, not sitting on the saddle but not really aggressive and over the handlebars. A good tip is to hold both brakes on which will help the bike from trying to propel forwards.
It's a good idea to wear all your riding gear to allow for the additional weight in setup.
4. Gently bounce up and down a little bit to let the suspension settle. Have a friend slide the rubber travel ring down to the bottom of both the fork and shock, then gently dismount the bike as to not compress the fork and move the travel ring.
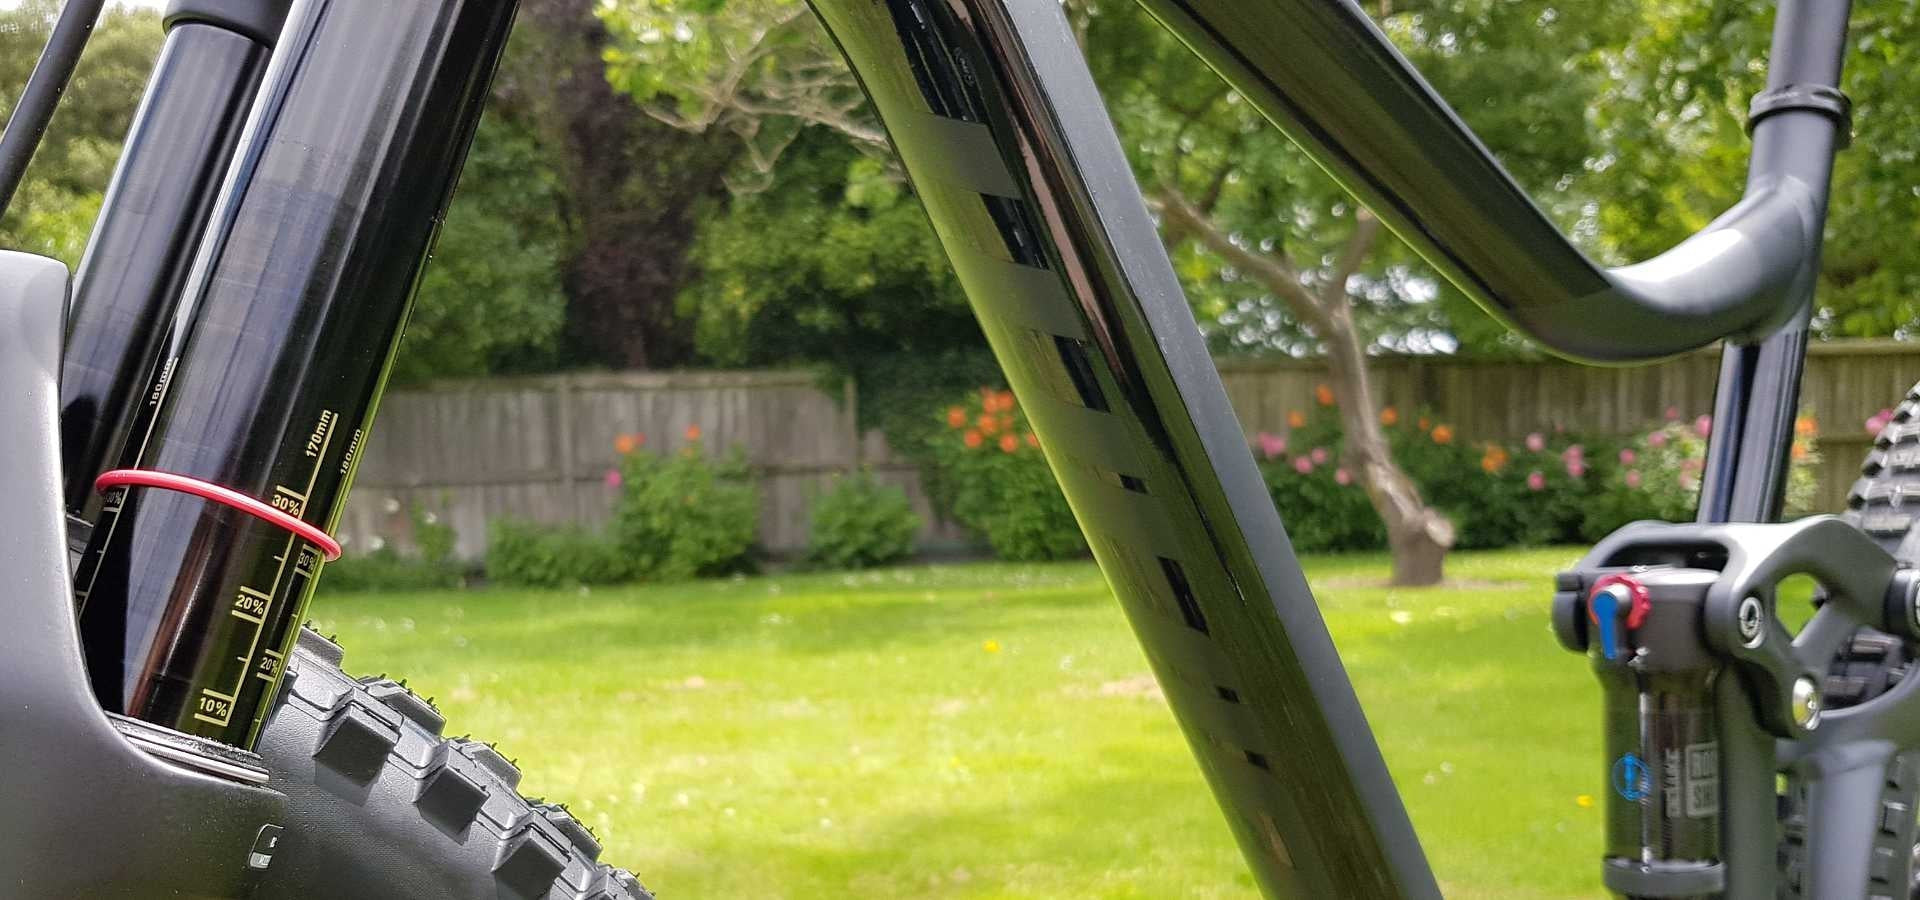
5. Now you'll need to measure how far the rubber ring has pushed up, and there's your sag measurement.
6. Make any adjustments in 5psi increments when the sag is close to what you want until you reach your preferred setting.


Suspension Sag
The Sag amount is the preference, not a hard-and-fast rule, so you can adjust the feel of your bike if you're running a flatter, less technical courses or bigger more aggressive terrain. Trail bikes and long travel bikes usually like 25-30% sag. Experiment with it until you have found the best setting.
Style of bike & Sag
If your suspension fork and or shock doesn't have markings on it for sag settings you'll need to measure this. For this, you'll need to deflate the suspension, fully compress allowing the rubber travel ring to depress fully. Now re-pump the fork or shock but up to pressure again measuring the distance from the rubber travel ring to the seal. This is the amount of travel the suspension has which you can then divide by the sag, i.e. 38mm travel running 25% sag would be 9.5mm of movement of the rubber travel ring once weight on the bike.
Bottoming out isn't necessarily a bad thing unless it's happening all the time and on small drops and bumps. Generally, your trail bike should be using all of its travel if you're hitting the big trails. If you're bombing down the trails and your rubber ring isn't at the top of the stanchion tubes, you have too much air. If you're blowing through travel on easier stuff, you probably need air.
Rebound
Rebound dampening controls how quickly the suspension can extend after being compressed. This is normally a red knob on your fork and shock. You'll need to adjust your suspension so it returns to its natural position quickly, but not so quickly that it bounces your tyre off the ground.
As a general rule of thumb, start by finding out how many clicks of rebound you have to work with. Turn the rebound knob all the way to the left (toward the jackalope on RockShox or toward the minus sign on Fox) to remove all the damping. Then, count the clicks as you turn the knob to the right (toward the turtle on RockShox or the plus sign on Fox). Once you have your number, click back in the other direction half way. From here, you can feel the amount of rebound you have by compressing and releasing the suspension. Add or subtract clicks as needed.
Lockout Levers
If your fork or shock has a lockout compression damping position, only use this setting when riding on the road, or smooth terrain. If your sag is set correctly, you will want your suspension active when climbing technical single track as this allows better control of your bike while climbing and increases traction.
Low-Speed Compression Dampening
Low-speed compression controls the compression speed when the suspension compresses slowly, such as a small bump or pedalling induced suspension bobbing. Adding more Low-Speed compression will allow the fork to stay higher in its travel, have a tendency to skip over the smaller bumps and give a firmer ride. With less Low-Speed compression your fork will be more active and improve small bump sensitivity.
High-Speed Compression Dampening
High-speed compression controls the compression speed when your suspension compresses very quickly, such as hitting a rock or landing a jump or drop. Adjusting this will make your fork firmer at the bottom of the travel meaning it's less likely to bottom out.
Bottomless Tokens or Spacers
Your suspension may or may not be compatible with volume spacers, such as bottomless tokens or bands. Adding tokens or bands will decrease the air spring volume and increase the Air Spring Ramp, making the fork firmer and harder to fully compress. Removing tokens or bands will increase the air spring volume and decrease Air Spring Ramp, making it easier to fully compress.
It can be a pretty daunting process if your in need of some help with the setup process then get in touch. We hold clinics on this instore, which you can book into here.
Resources
You can head over to the manufactures to more in-depth service manuals,
If this is all too overwhelming, feel free to drop us a line, we're more than happy to help.


Helpful article thankyou
Thanks for this, this is a great simple practical way to make the adjustments and set up/ tune ones shocks, good little hints too. A big learning point was to not sit on the seat, get into a neutral position off the seat.
Thanks very much
Carl